
This is currently my favorite drink for surviving this summer heat. It is perfectly refreshing and has a unique citrus flavor. 
Here’s to the summer heat and happy Bastille Day,


This is currently my favorite drink for surviving this summer heat. It is perfectly refreshing and has a unique citrus flavor.
Here’s to the summer heat and happy Bastille Day,
 This is one of my favorite cakes of all time. There is a little cupcake shop in Portland that has the best coconut cream cheese cupcakes and I have finally been able to replicate the taste in gluten free cake form.
 For the frosting, just cream 8 oz of unsalted butter, then add 10 oz. cream cheese. Mix in 1 tsp. vanilla. Then, incorporate 1/2 cup of sifted confectioners sugar (add more sugar if you like sweeter frosting). Once the cakes have cooled, put a thin layer of frosting between the cakes. Then lightly frost the top and sides. Lastly, add a little bit of toasted coconut to the top.
 This is a great cake recipe but really everything is good with cream cheese frosting. Get the printable recipe here.
What type of cake do you like to make in the summer?
Not sure if any of you are Bachelorette fans like I am (it’s one of my guilty pleasure), but I decided to make a Bachelorette Bracket. Sort of like March Madness but instead of basketball teams, it’s the contestants on the Bachelorette. (FYI if you are not caught up don’t look any further).

If you play with friends, you can award points based on how many you correctly move to the following week. If you get 6 out of the 8 in Round 4 correct you would get 6 pts. for that round, and so on. Since we are already a few weeks in, I started the brackets with the 11 remaining bachelors. Get the PDF version here.
Who do you think is a good match for Andi and will make it to the Final Four?
I’ve decided to start a new series on Silk & Cinnamon that highlights a fun party idea and includes decor, food or drink ideas, and an invite that you can customize for your own use. The first one is a flamingo themed pool party that has a hint of the 50’s.
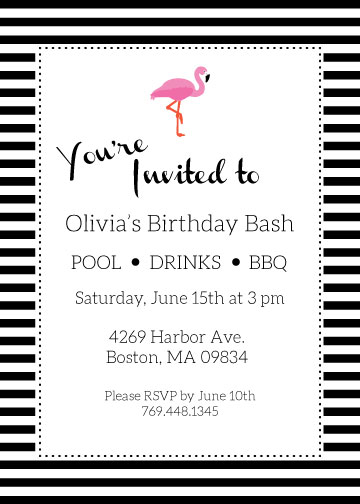
 1. A chic black and white striped tent // 2. Lawn flamingos straight from the 50’s // 3. Striped pool towels // 4. Flamingo straws // 5. Polka – dot cupcake liners // 6. Inflatable flamingo floating drink holders
If you are interested in using this invitation for your own party, message me and I can send you a customized file with your details that you can print yourself.
I hope you enjoy this new series on the blog, I have already got a couple more ideas in the works.
Following the creation of my terrarium, I decided to try another planting project. This time with mason jars and herb seeds, hopefully they’ll be successful.

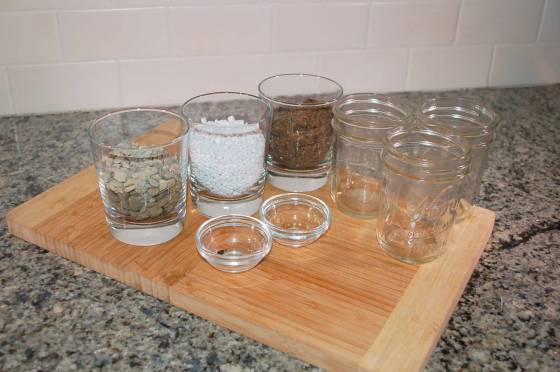 For each seed type you’ll need: 1 mason jar, a large handful of putting soil, a small handful of pea pebbles, a handful of perlite, herb seeds. You can also buy a kit with all the supplies you need here.
 Directions: 1. Start with an inch of perlite. 2. Then put a 1/2 inch layer of pebbles. 3. Followed by 2 inches of soil. 4. Make a small hole in the soil with your finger, about 1 inch deep. 5. Place the herb seeds and the hole and cover with soil. 6. Add water and sunlight.
I’m hoping my seeds will soon grow into plants that I can use in cooking.
Off to enjoy the Seattle sun!
 These pom-pom push pins are a great way to spruce up a bulletin board and I was able to make them from supplies I already had lying around. All you will need to make them are some colored yarn, flat tacks, and a glue gun.
 1. You’ll need some brightly colored yarn and tacs
2. Start by wrapping the yarn around two fingers. After approximately 50 wraps, remove the loop carefully from your fingers and lay flat. Cut a piece of yarn about 8 inches long.
3. Lay the wrapped loop of yarn, centered, on top of the 8 inch piece and tie a knot once. Then flip the loop over and tie a double knot on the other side. Try to tie this as tightly as possible.
4. Once tied, cut all the loops.
Lastly, fluff up the ball by rolling it between your hands and trim the yarn so that it begins to form a ball. Try and keep one side of the ball relatively yarn free so that it is flat. On the flat side of the yarn ball, glue the push pins with the glue gun. I found it helpful to glue the push pin onto the pom-pom and then do a second layer of glue around the edges of the push pin so that the pins are extra secure.


I hope you had a great weekend and this adds some spruce to your bulletin board,
 For some festive holiday decor, I made a simple white pompom garland. I used white yarn and it ended up looking just like a garland of snowballs, but this would be just as perfect in red and pink for valentines day.
For this tutorial, all you need is a spool of yarn (I used about 300 yds for 12 pom poms), bakers twine, and a medium pom pom maker. I started by wrapping the yarn around each side of the pom pom maker, I ended up doing between 2-3 layers of yarn on each side.
 Once you’ve wrapped the yarn fully around both sides of the pom pom maker, close both sides and begin cutting all of the loops.
 Now that all the loops have been cut, tie a knot around the center portion of the pom pom maker. Use a double knot and make it as tight as possible.
 Once you’ve removed the pom pom, trim the ball of any extra yarn. After completing about 10 pom poms, string the yarn balls onto the bakers twine.
Hang on a mantel for some added holiday decor.
 I’ve been wanting a leather fringe key chain for a while. But I couldn’t really justify paying for one when I knew it would be incredibly easy to make. When searching for where I could buy leather, I came across a shop in Seattle that sold leather scraps by weight. For four dollars, I got enough leather to make multiple key chains + the key rings. To make one key chain you will need a piece of leather that is at least 7 inches x 3 inches and one key ring.
From the leather cut out pieces in the following dimensions (if you want longer fringe cut the pieces more than 7 inches wide):
 Next, with the largest piece, cut 7 fringe strips on each side. Each strip should be 1/4 of an inch wide and 2.5 inches long. The center of the piece should remain uncut.
With the medium piece, cut 2 fringe strips on each side, with the same dimensions as before.
 Place the medium piece in the center of the larger piece, with both of the good sides facing down. Wrap the larger piece around the medium piece so that the large piece is essentially folded into thirds. Use a glue gun on the non-fringe portion to secure the leather.
 Slide the piece through the key ring and fold over. Next, glue the tip of the skinny piece to folded over leather, just below the key ring. Wrap the piece around and secure the end with another dot of glue.

Hope you enjoyed this simple tutorial,
I’ve been dying to make a terrarium for a while. Every time I passed by a plant shop I would stop in and contemplate buying the supplies. I finally decided to make one and purchased all the supplies at a cute little terrarium shop in Ballard. I decided to go with a tropical terrarium because I have a tendency to be over eager regarding watering and thought I would do best with plants that actually want water, plus I’ve been eyeing this glass container for some time (closed containers are better suited for tropical terrariums, while open ones are best for succulent plants).
 You will need: a glass container, a few mini plants (either tropical or succulents), a large handful of small pebbles, a few cups of soil, a handful of charcoal, and a variety of medium pebbles
 First: create a small layer of pebbles on the bottom of the class container (this will allow for drainage). Second: on top of the pebbles put a layer of charcoal (approx. 1/4 to 1/2 inch thick). Third: put 2 or 3 inches of soil on top.
 Next, plant the plants in the soil by creating small holes and placing the roots in the hole and filling with additional soil if needed. Lastly, layer some medium pebbles on the top of the soil. For tropical plant care, keep in a shaded place and lightly mist with a spray bottle on occasion. For succulent care, place in the sun and lightly mist very rarely.

What type of plants to you keep in your house?
This week marks 1 year of Silk and Cinnamon. To commemorate, this week’s posts will have a celebratory theme. To start, I’ve compiled some of my favorite tablescapes, including a Texas inspired wedding and Kentucky Derby themed decor.


Texas Forever // Hot Pink & Gold // Exotic Brights // Sparkling Lights // St. Patrick’s Day // Kentucky Derby
Here’s to the past year – cheers!
